
After we moved into our new workspace at RedAlkemi, we were very excited to get decorating, while most of the furniture was built in-house and the upholstery was already owned (what are the chances that we had an entire sofa set in red), all we needed was the finishing touch of a mural in our brand colours. And where better than on the wall right in front of the entrance? The team chose to go with lettering the motto ‘Yes, it’s possible’ and I was handed the task to get creating.
Sketching the artwork
After much ideating, discussions, failed attempts at sketching and almost ripping my hair out, I ended up with a sketch that I was happy enough to proceed with digitally.

Building the foundation
Once I got the sketch scanned, I opened it up in Photoshop and proceeded to clean it out a little. It’s funny how when you start using the grid in the software you realise that despite your best efforts of following your hand-drawn guides, there will naturally be some errors and your lines will not be perfectly straight.

There are a couple of things I kept in mind while cleaning this up:
- Following a grid (aligning to baseline, x-height, ascenders and descender line)
- Adjusting stroke thickness and making sure all my lines are straight
- Tweaking the letter spacing
- And just cleaning up the letterforms in general

I ended up with a foundation I was very happy with, now it was time to add some more depth and colour to the design to bring it to life.

Experimenting with styles
Once I got my artwork ready in Photoshop I switched to Illustrator – my personal preference is working with vectors. I tried out a few directions I could take the design in, but always keeping in mind the required brand colours and how it would look on a wall at a larger scale.

Eventually, I narrowed it down to these four options and took a vote from my team, the bottom right one was a clear winner.

Tracing it out
To get the design on the wall, I projected it and traced it out with a pencil, simple and easy. The wall itself was about 12ft by 10ft and the artwork area I assumed was about 8ft by 5ft. I needed to leave a larger margin at the bottom because we planned on putting the couch there.

Painting it in
It took me a few weeks to paint this, because, well, I have a job and I can only take out so much time to do this. But it was a fun experience since it was right next to my desk at work. Whenever I would get a bit frustrated or irritated from sitting at my desk, I would just go on over and paint for a few minutes to get some movement. Fun times.
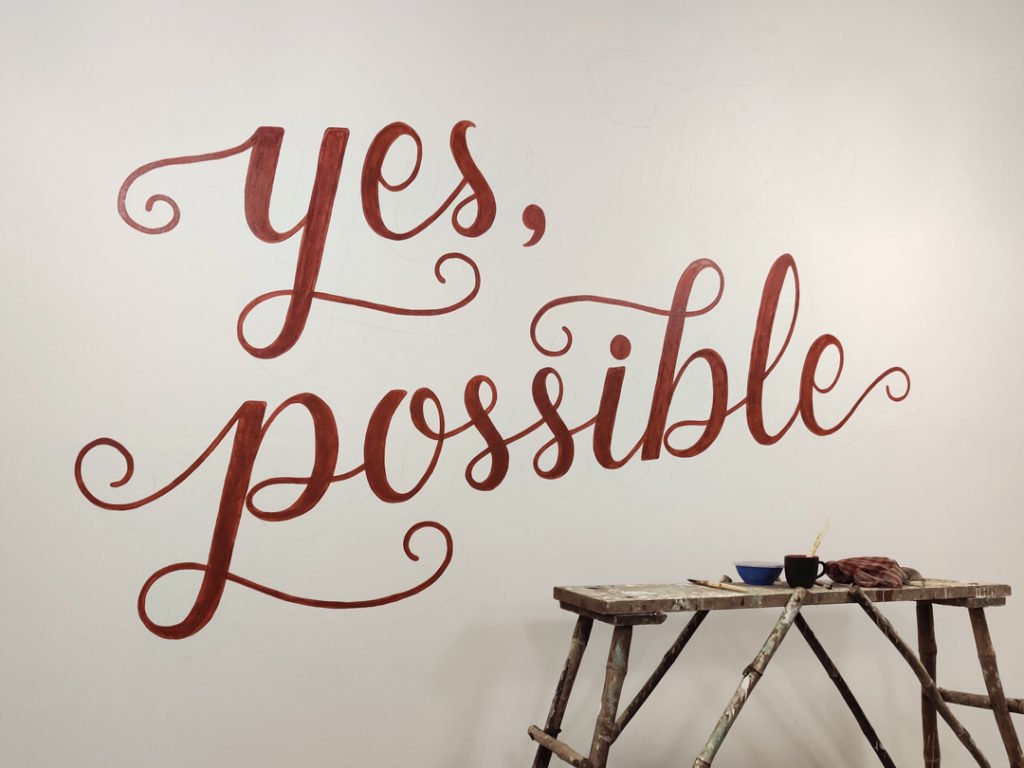
The final look
I’m very happy with the final piece. Can’t wait for our team to be back at work once quarantine is over to see it!
In the meantime, you can check out my other murals here!
